
Make a daily menu that follows a spreadsheet: print it, show it on a screen, share it
Updated 2026-11-07
A hotel restaurant changes its menu every day. The chef updates a list, someone retypes it into a design, and the printed card or the lobby screen is wrong by lunch. A live menu skips the retyping: the design reads its dishes and prices from a spreadsheet, so the sheet is the only thing anyone edits.
The design stays a normal, fully editable Ridvay design. You connect a Google Sheet, an Excel or CSV file, or a table you paste, repeat one dish row for every line, and the same design can then be printed as a PDF, shown full screen on a TV or embedded as an image. Only a linked Google Sheet follows your edits by itself; an uploaded or pasted table is stored in the design and changed with “Edit” in the Data tab.
How to do it
Start from a menu design
Describe it in the editor’s start screen (“an elegant A4 dinner menu for a hotel terrace restaurant”), or upload last week’s Word or PDF menu and let Studio lay it out. Any design works. You only need one dish row that looks the way every row should look: a name, a price and a short description.
Open the Data tab and connect your list
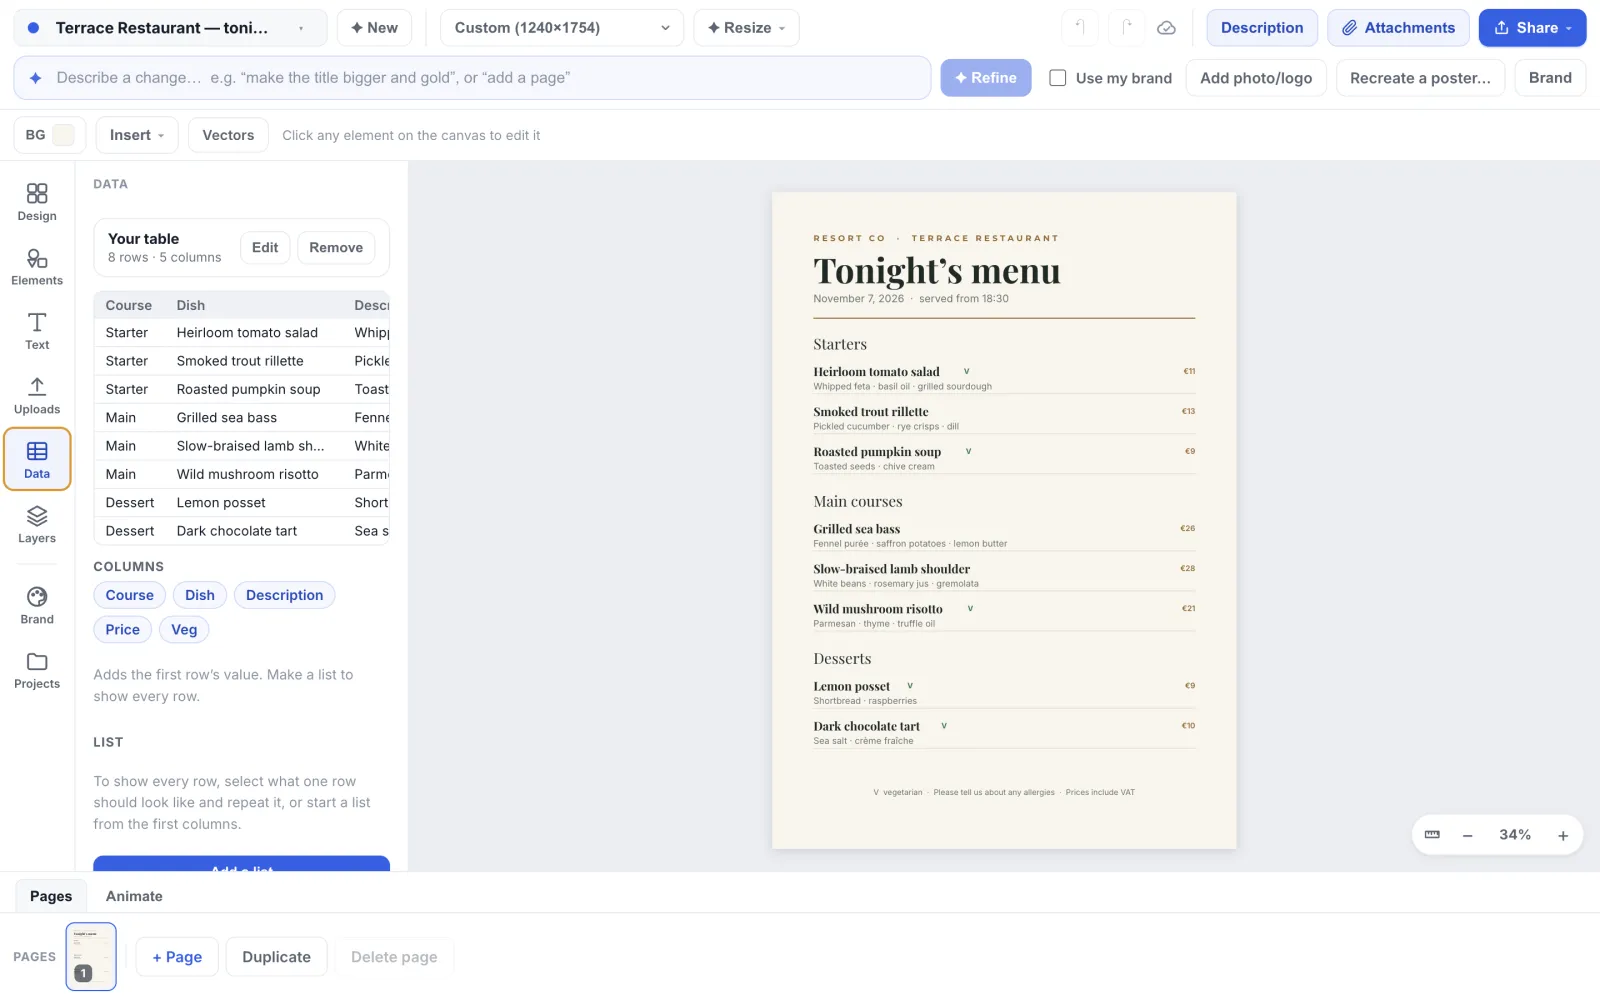
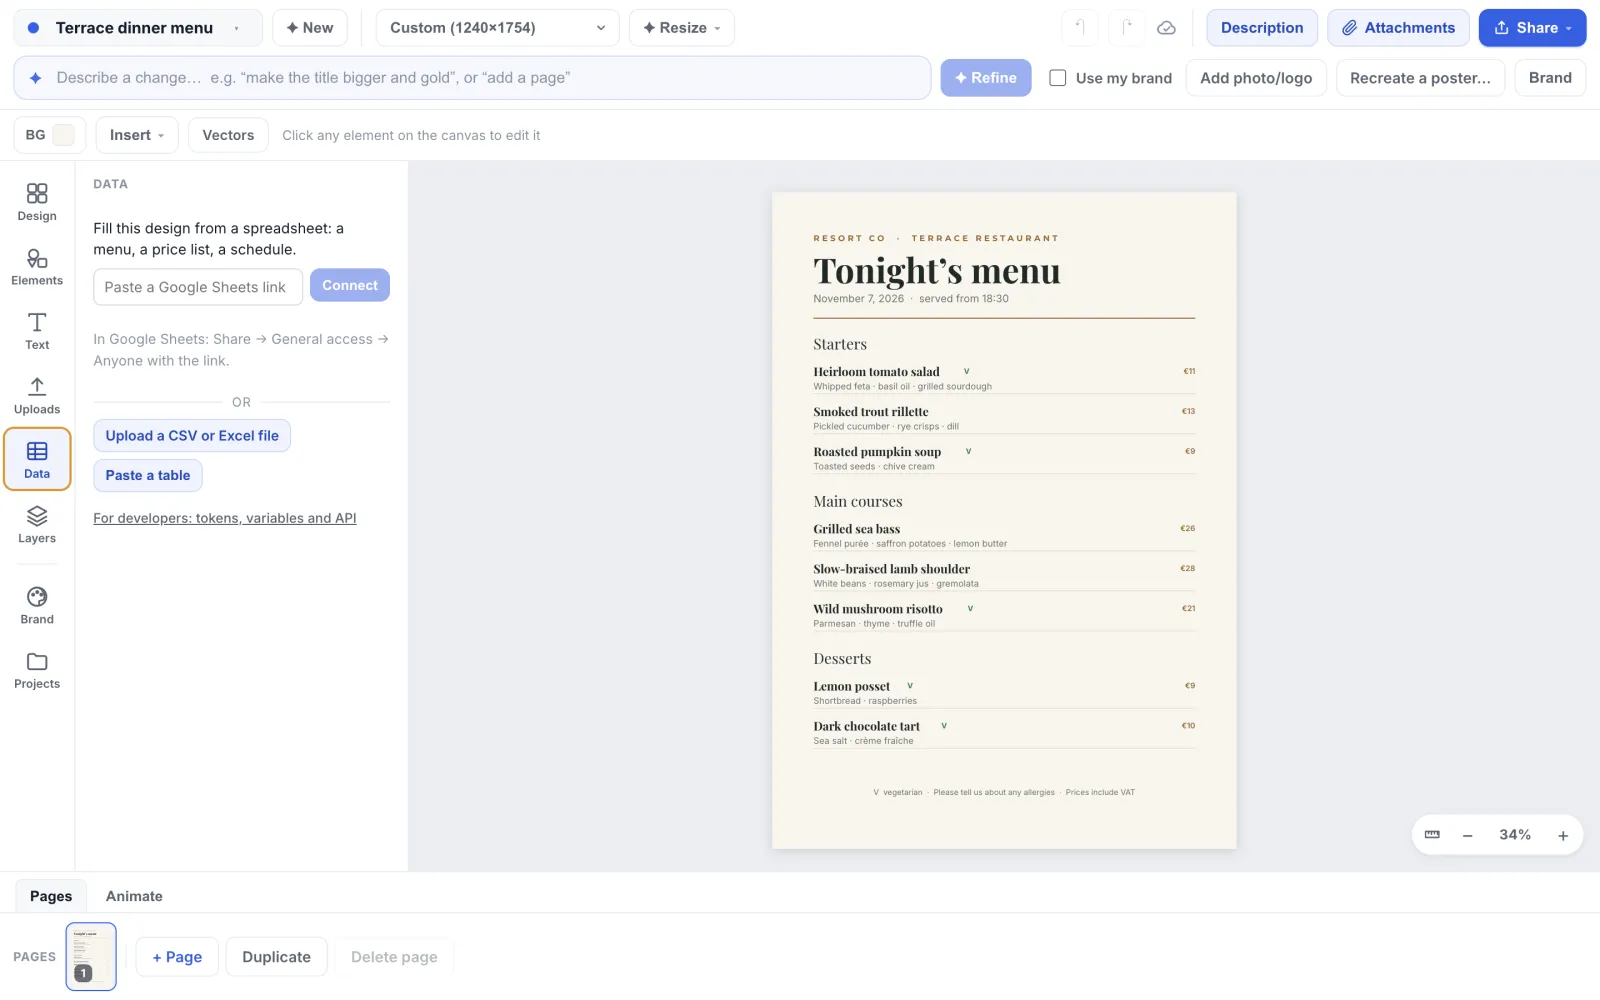
Click Data in the left rail. Paste a Google Sheets link (in Sheets choose Share, then General access, then “Anyone with the link”; “Publish to web” is not needed) and choose “Connect”, choose “Upload a CSV or Excel file”, or choose “Paste a table”, paste cells copied from Excel and choose “Use this table”. The first row names the columns. Studio shows the rows it read, such as “8 rows · 5 columns”.
Put a column on the design
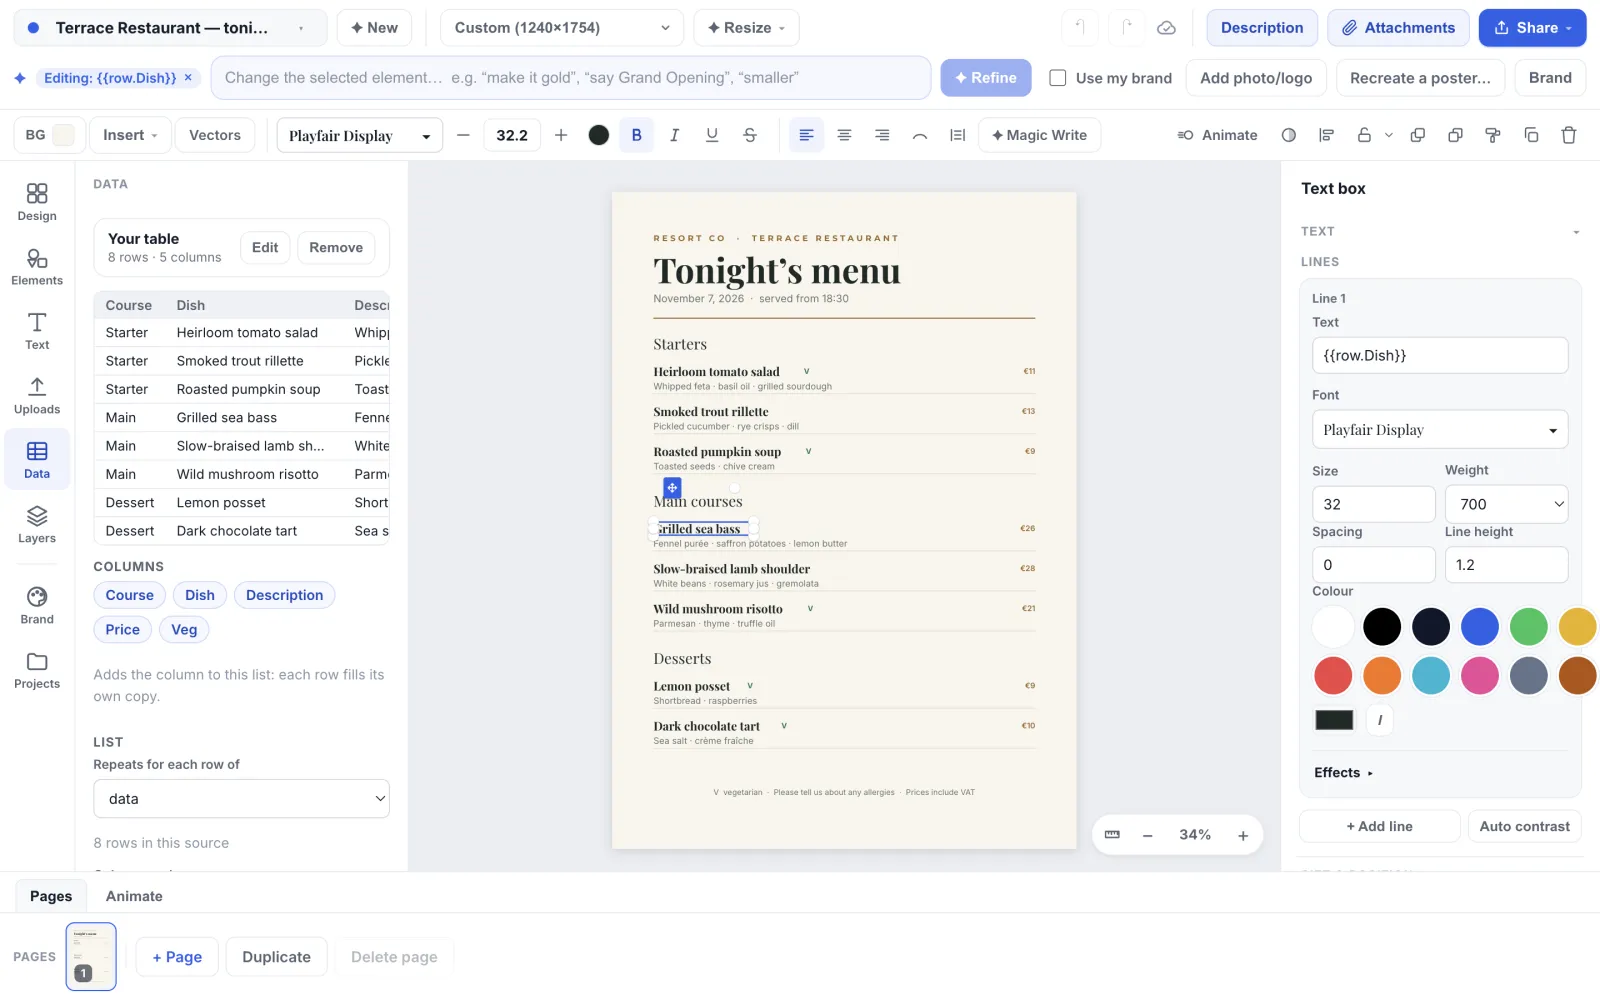
Under “Columns” each column is a chip: Course, Dish, Description, Price, Veg. Inside a list, a chip puts {{row.Dish}} into the selected text and every row fills it with its own value. Outside a list, a chip puts only the first row’s value, the same on every copy. So type {{row.Dish}}, {{row.Price}} and so on into your one dish row now, or repeat the row first (next step) and then click the chips.
Repeat the dish row for every dish
Select the elements that make up one dish (the name, price and description together) and, in the List section, choose “Repeat”. With nothing selected, “Add a list” starts a list from the first two columns instead. If each dish gets a mark such as a green V, select the V too, so it is part of the row. Studio makes a copy for every row of the sheet and stacks them. Add a dish to the sheet and a new row appears. Remove one and the list closes up. “Stop repeating” stops the copying and leaves the one row you built.
Split the menu into courses
Select a dish in a list. In the List section, “Only rows where” has three boxes: pick row.Course in the first, “is” in the second and type Starter in the third. Each course is its own list: build one dish row per course on the page, choose “Repeat” on each, then set Main on the second list and Dessert on the third. “Always” in the first box means no filter. Put a heading above each list. The chef only edits the sheet, and each dish lands under its course.
Show a mark only where it applies
The mark must be part of the repeated row. Select the green V, and in the List section set “Show when” to row.Veg, leaving the next box on “has a value”. The mark appears on rows where that cell is not empty and disappears on the others. A V outside the list only offers the row count of each source, not Veg. For a column of Sheets checkboxes, choose “is ticked”. Use it for vegetarian, gluten-free, new this week or sold out.
Put today’s date on it
Type {{time.now}} into any text and it prints the date when the design is rendered, for example “November 7, 2026”. The date is the UTC day, written in English, so near midnight it can differ from the day on the hotel’s clock. A menu headed “Tonight’s menu · {{time.now}}” changes its date without anyone retyping it.
Print it, show it, or embed it
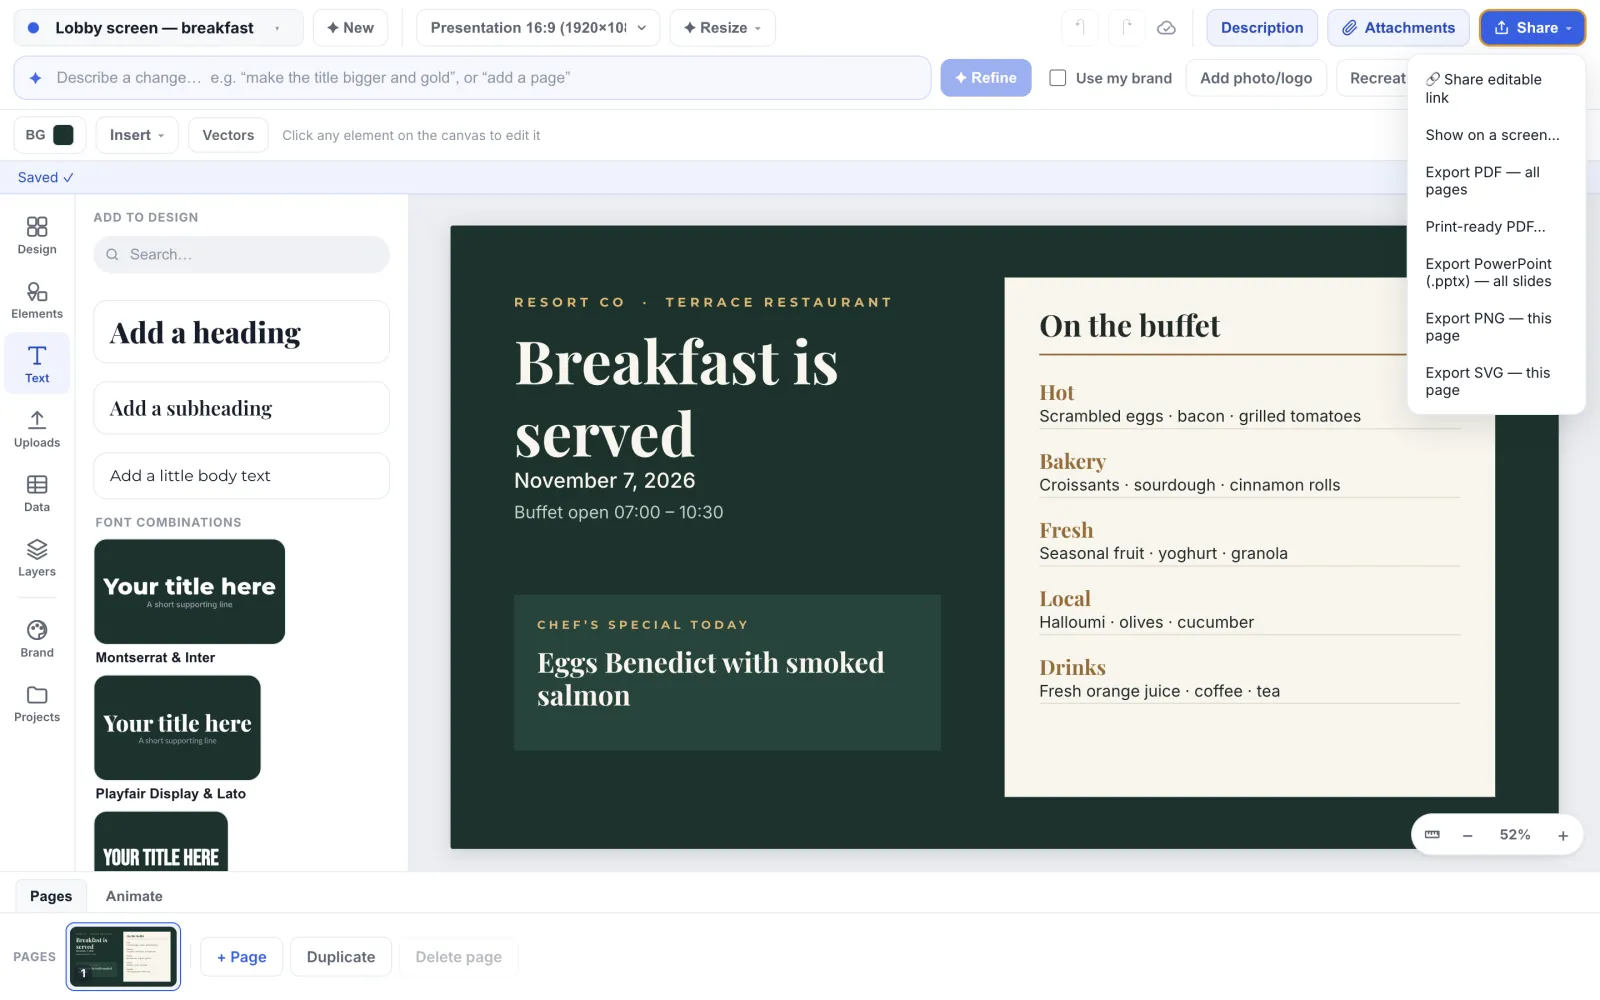
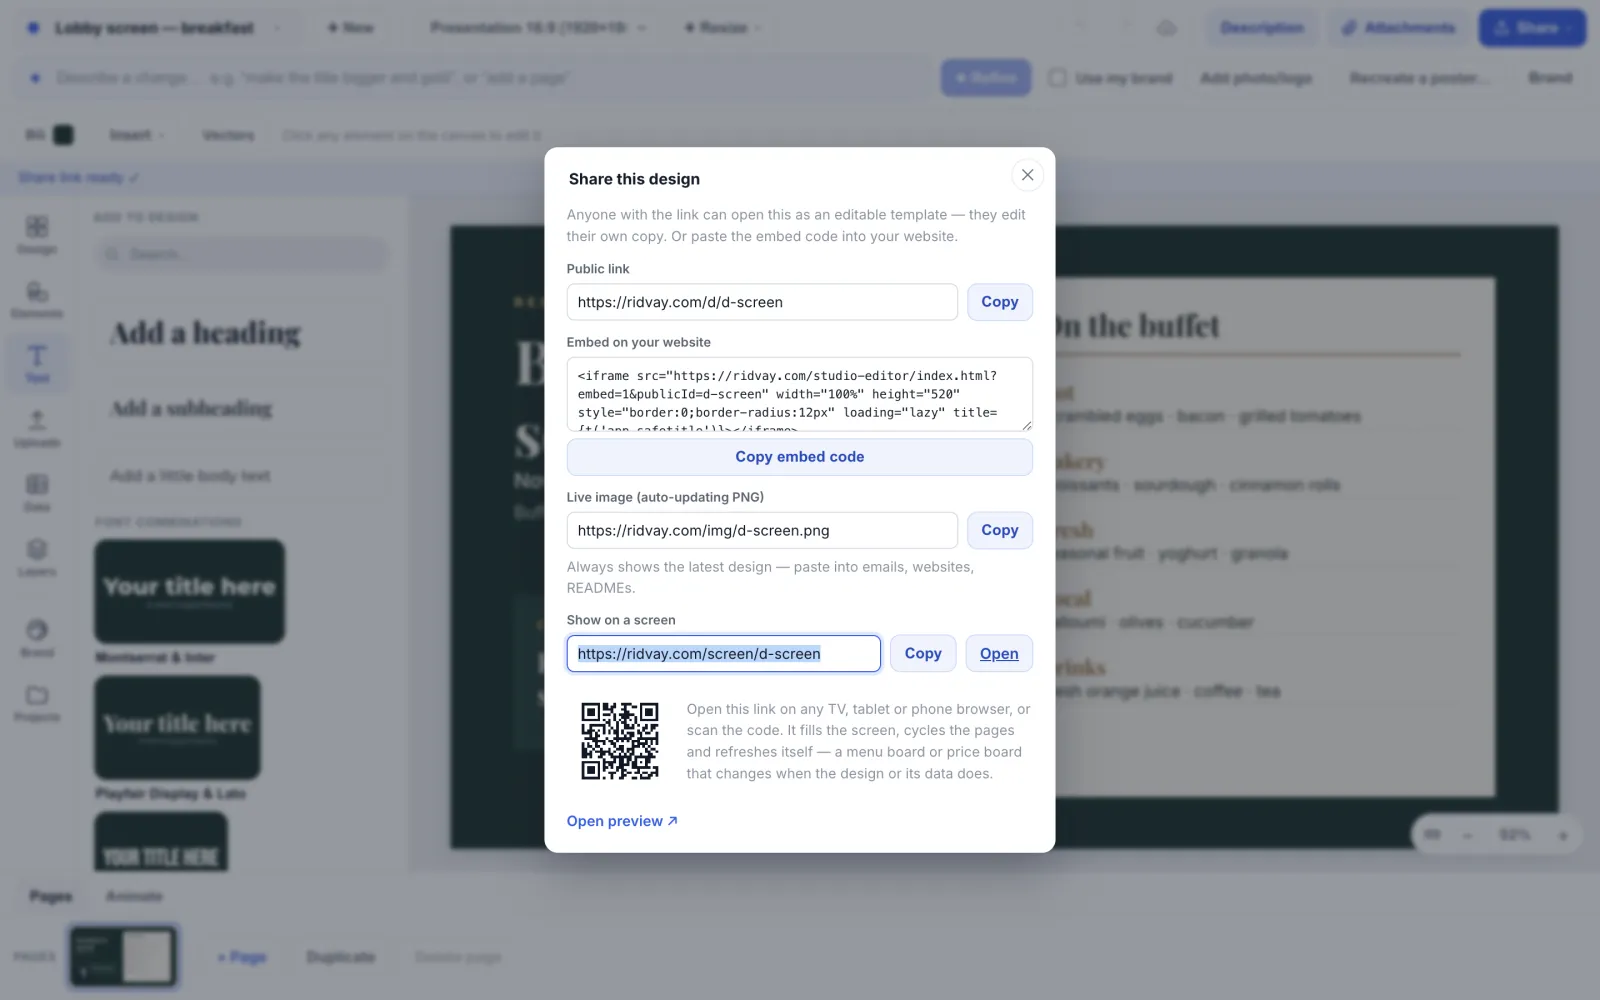
Open Share. “Print-ready PDF…” sets size and bleed for the printer and exports the rows the canvas shows, so keep “Show column names instead of data” in the Data tab off. “Show on a screen…” gives you a ridvay.com/screen link and a QR code to open on a lobby TV, which fills the screen and refreshes itself. The same card shows a live image URL, ridvay.com/img/<id>.png, that you can paste into a website or an email.
Each morning, change the sheet
Edit the dishes in your sheet. Studio keeps a sheet’s rows for up to a minute. A PDF you export from the editor prints the rows the canvas already shows, read when you opened or last changed the design, so reopen the design after editing the sheet. The print link reads the sheet itself. A screen asks for a fresh picture every 5 minutes by default, so new rows can take a few minutes to appear. A live image in a web page or email can show the old picture for a few minutes. There is nothing to publish. If your team has approvals on and the design has an approved version, the screen, the live image and the print link show that approved version, with the rows and date it had when it was approved or an approver last edited it. Approve the design again to show newer rows.
Tips
- Keep one sheet tab per menu type (dinner, breakfast, bar) and one design for each. To switch a design to another tab, open that tab in Google Sheets, copy the address from the browser’s address bar (it ends in gid= and a number), and paste it after clicking “Change” in the Data tab. Without a gid, the tab with gid 0 is read, which is usually the first one.
- Write prices as text with the currency in the cell (€26), so the sheet decides how they look. Studio does not add a currency sign or format the numbers.
- Leave room for a longer day. The design has a fixed page size, so give each list a little more height than today’s dish count needs.
- Test the empty case. A column left blank in the sheet shows nothing, which is what you want for “Show when”, so you can see how a row without a description looks.
- For a TV in the lobby, use the 16:9 presentation size. By default the screen checks for new rows every 5 minutes. To check more often, add ?refresh=60 to the end of the screen link; 60 seconds is the shortest it accepts. For a printed card, set the print size first and check the Preflight list.
Frequently asked questions
- Does the sheet have to be public?
- The link needs “Anyone with the link” so Studio can read it. Nothing is written back to your sheet, and the link is not drawn on the design, the screen or the live image. It is stored in the design, though, and “Show on a screen…” shares the design. Anyone who has a shared design’s link can read it, including the sheet address or a pasted table. Keep private details out of the sheet.
- Can I use Excel instead of Google Sheets?
- Yes. Upload an Excel or CSV file in the Data tab (an Excel file is read from its first sheet), or copy the cells and choose “Paste a table”. An uploaded or pasted table is stored in the design, so edit it with “Edit” in the Data tab. A Google Sheet is the one that follows your changes by itself.
- How many dishes can the menu hold?
- A table or a linked sheet is read up to 500 rows, and a table stored in the design is also cut at 100,000 characters. One list shows at most 200 rows, which is also the most the “Show” box takes. A design can hold 2,000 copied elements in all, so a row made of many elements reaches that sooner. A cell is cut at 600 characters. A page holds as many as fit its size, so a one-page menu usually has far fewer. Give long lists their own page.
- Can the same sheet drive a printed menu and a lobby screen?
- Yes. Make two designs, one A4 and one 16:9, and connect both to the same Google Sheet link. They stay in step because they read the same rows. An uploaded file or pasted table is stored inside each design, so two designs would not follow each other.
- What if the sheet is down when the screen refreshes?
- A design can carry fallback text for a single {{value}}, which shows when the source cannot be reached. A list is different: if its sheet does not answer, the list shows no rows, and the editor says “This source didn’t answer, so no rows show.” Studio keeps an answer, a failure too, for a minute before it asks again. A linked source gets about 3 seconds to answer, and one larger than 256 KB counts as unreadable.
- Do I need to sign in?
- Pasting a table or uploading a CSV file works without an account, and the Data tab shows the rows and column chips. Studio’s server lays out the rows of a repeated list, so signed out the list stays as raw {{row.Dish}} text. Sign in to see the list laid out, connect a Google Sheet, upload an Excel file, share a screen or create a print link.
Try it on your own design
Free to start, nothing to install.
Related guides
- Living designsLiving designs: a menu board or price board that updates itself on any screen
- Print shop linkSend your print shop one link that always opens the latest PDF
- From Word, PDF or ExcelTurn a Word, PDF or Excel file into a designed menu, price list or flyer
- Print-ready PDFExport a print-ready PDF with bleed, crop marks and a safe zone